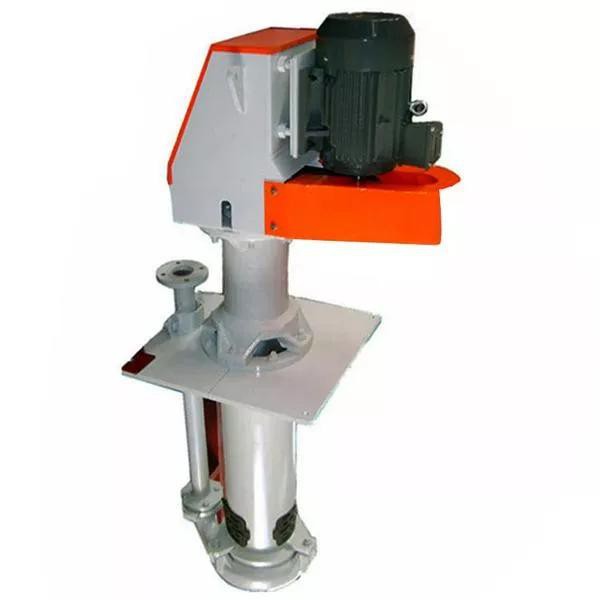
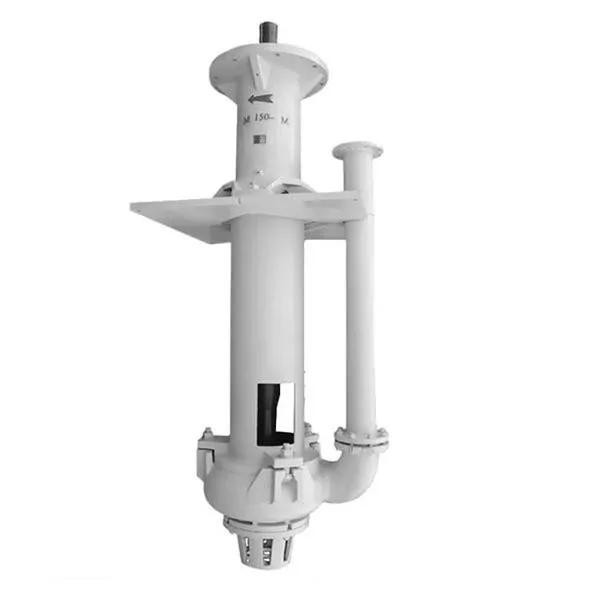
Cleaning a vertical sump pump is a crucial maintenance task that ensures its efficient operation and extends its lifespan. As a supplier of Vertical Sump Pump, I understand the importance of proper maintenance and cleaning. In this blog post, I will guide you through the step-by-step process of cleaning a vertical sump pump, providing you with valuable insights and tips to keep your pump in top condition.
Why Cleaning a Vertical Sump Pump is Important
Before diving into the cleaning process, let's first understand why cleaning a vertical sump pump is so important. Over time, sump pumps can accumulate dirt, debris, sediment, and other contaminants. These build-ups can cause several issues, including reduced pumping efficiency, clogging, and even pump failure. By regularly cleaning your vertical sump pump, you can prevent these problems and ensure that your pump operates smoothly and effectively.
Tools and Materials You'll Need
Before you start cleaning your vertical sump pump, gather the following tools and materials:
- Safety goggles and gloves
- A bucket
- A small brush (such as a toothbrush)
- A garden hose or a pressure washer
- A screwdriver or a wrench (depending on the pump model)
- A mild detergent or a pump cleaner
- A clean cloth
Step-by-Step Guide to Cleaning a Vertical Sump Pump
Step 1: Safety First
Safety should always be your top priority when working with any electrical equipment. Before you begin cleaning your vertical sump pump, make sure to turn off the power supply to the pump. This will prevent any accidental electrocution or injury. Additionally, wear safety goggles and gloves to protect your eyes and hands from dirt, debris, and chemicals.
Step 2: Remove the Pump from the Sump Pit
Most vertical sump pumps are installed in a sump pit. To clean the pump, you'll need to remove it from the pit. Start by disconnecting the power cord from the electrical outlet. Then, use a screwdriver or a wrench to loosen and remove the bolts or screws that hold the pump in place. Carefully lift the pump out of the sump pit and place it on a clean, flat surface.
Step 3: Inspect the Pump
Once you've removed the pump from the sump pit, take a close look at it to identify any visible signs of damage or wear. Check the impeller, the motor, the housing, and the electrical connections for any cracks, leaks, or loose parts. If you notice any damage, it's important to address it before proceeding with the cleaning process. In some cases, you may need to replace the damaged parts or contact a professional for repairs.
Step 4: Clean the Pump Housing
The pump housing is the outer shell of the pump that protects the internal components. Over time, the housing can accumulate dirt, debris, and sediment. To clean the housing, use a garden hose or a pressure washer to rinse off the exterior of the pump. Make sure to remove any dirt or debris that may be stuck to the housing. If there are stubborn stains or build-ups, you can use a mild detergent or a pump cleaner to scrub the housing with a small brush. Rinse the housing thoroughly with clean water to remove any soap residue.
Step 5: Clean the Impeller
The impeller is the rotating part of the pump that creates the suction and pressure needed to move water. Over time, the impeller can become clogged with dirt, debris, and other contaminants. To clean the impeller, use a small brush to remove any dirt or debris that may be stuck to it. Be careful not to damage the impeller blades while cleaning. If the impeller is severely clogged, you may need to soak it in a mild detergent or a pump cleaner for a few hours to loosen the dirt and debris. Rinse the impeller thoroughly with clean water and let it dry completely before reinstalling it.
Step 6: Clean the Float Switch
The float switch is a device that controls the operation of the pump by turning it on and off as the water level in the sump pit rises and falls. Over time, the float switch can become dirty or stuck, which can cause the pump to malfunction. To clean the float switch, use a clean cloth to wipe off any dirt or debris that may be stuck to it. Make sure to check the float switch for any signs of damage or wear. If the float switch is damaged, it's important to replace it to ensure the proper operation of the pump.
Step 7: Clean the Check Valve
The check valve is a one-way valve that prevents water from flowing back into the sump pit after the pump has stopped pumping. Over time, the check valve can become clogged with dirt, debris, and sediment. To clean the check valve, use a small brush to remove any dirt or debris that may be stuck to it. Make sure to check the check valve for any signs of damage or wear. If the check valve is damaged, it's important to replace it to prevent water from flowing back into the sump pit.
Step 8: Reassemble the Pump
Once you've cleaned all the components of the pump, it's time to reassemble it. Start by reinstalling the impeller, the float switch, and the check valve. Make sure to tighten all the bolts and screws securely to prevent any leaks. Then, reconnect the power cord to the electrical outlet and place the pump back into the sump pit. Make sure to align the pump properly and secure it in place with the bolts or screws.
Step 9: Test the Pump
After reassembling the pump, it's important to test it to make sure it's working properly. Turn on the power supply to the pump and let it run for a few minutes. Check the water level in the sump pit to make sure the pump is pumping water out of the pit. Listen for any unusual noises or vibrations coming from the pump. If you notice any problems, turn off the power supply to the pump immediately and check for any issues.
Tips for Maintaining Your Vertical Sump Pump
In addition to regular cleaning, there are several other things you can do to maintain your vertical sump pump and ensure its long-term performance. Here are some tips:
- Check the pump regularly: Inspect your vertical sump pump at least once a month to check for any signs of damage or wear. Look for cracks, leaks, loose parts, and other issues. If you notice any problems, address them immediately to prevent further damage.
- Keep the sump pit clean: Regularly clean the sump pit to remove any dirt, debris, and sediment that may accumulate in it. This will prevent the pump from becoming clogged and ensure its efficient operation.
- Test the pump periodically: Test your vertical sump pump at least once a year to make sure it's working properly. You can do this by pouring water into the sump pit and observing the pump's operation. If the pump doesn't turn on or doesn't pump water effectively, it may need to be repaired or replaced.
- Replace the pump as needed: Vertical sump pumps typically have a lifespan of 7 to 10 years. If your pump is approaching the end of its lifespan or if it's experiencing frequent problems, it may be time to replace it. Consider upgrading to a more efficient and reliable model to ensure the long-term performance of your sump pump system.
Conclusion
Cleaning a vertical sump pump is a relatively simple process that can help you maintain the efficiency and reliability of your pump. By following the steps outlined in this blog post and implementing the tips for maintenance, you can ensure that your vertical sump pump operates smoothly and effectively for years to come.
If you're in the market for a new Vertical Sump Pump, Heavy Duty Submersible Sewage Pumps, or High Head Sewage Pump, we're here to help. Our team of experts can assist you in selecting the right pump for your specific needs and provide you with professional installation and maintenance services. Contact us today to discuss your requirements and start the procurement process.
References
- "Sump Pump Maintenance Guide." HomeAdvisor.
- "How to Clean a Sump Pump." This Old House.
- "Vertical Sump Pump Installation and Maintenance Manual." Manufacturer's Guide.


